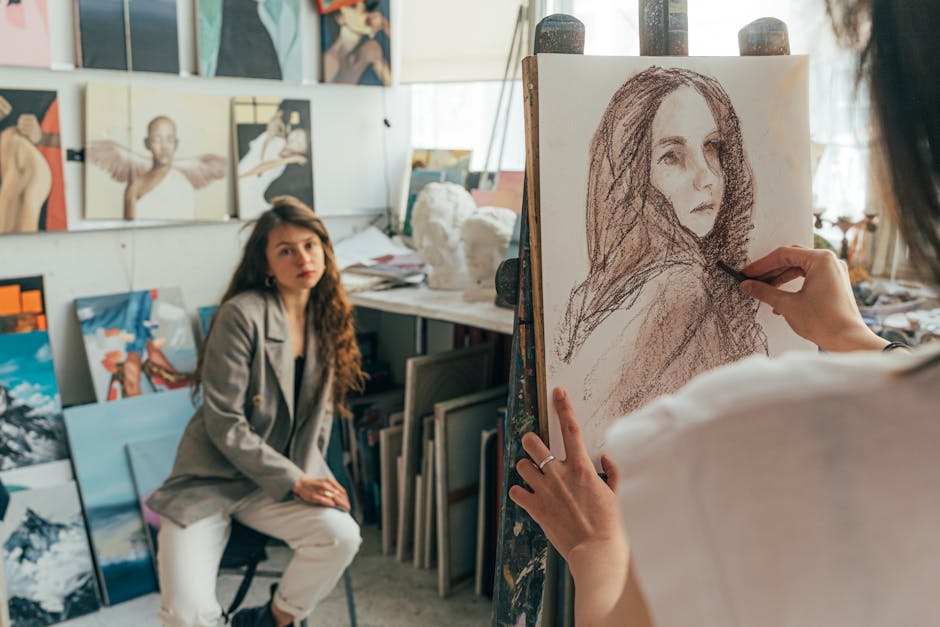
Start with Basic Forms
Begin by sketching simple geometric shapes: squares, circles, and triangles. This forms the groundwork for your drawing. For instance, if you're drawing a shoe, don't start with intricate details like shoelaces or stitching. Break it down into cubes for the base, triangles for the tip, and cylinders for the heel. This makes complex objects more manageable.
Once these primary shapes are in place, layer in secondary forms to refine the outline. For a human face, begin with an oval for the head, then add rectangles for the neck and shoulders. The simpler your initial shapes, the more adaptable they are.
Focus on relationships between your shapes. If the tip of the triangle representing a shoe is slightly off, your whole drawing skews. Measure the distance and angles between these shapes to keep your proportions in check.
Don't rush the details. Maintain light strokes initially to allow room for adjustments. By adjusting your primary forms, you set a proportional basis that stands resilient as you introduce complexity.
Take an apple, for example. Start with a basic circle that isn't too perfect. Picture how the top might be slightly flatter or how the bottom might bulge out. This circle is the essence of your apple and helps later when you add indentations or texture.
Building on from these basic forms also clarifies the spaces between objects. If you're drawing a bottle next to your shoe, start a new rectangle for the bottle but ensure it relates correctly to your shoe's primary forms.
Addressing complex subjects becomes simpler when you break them down. A tiger isn't just a series of stripes and fur. It starts with rectangles for its torso, circles for joints, and a triangle for the head.
Stay engaged and observe, measure, and understand your subject. Sketch circles, squares, and triangles to preserve accurate proportions from the start. This habit forms the cornerstone of successful and accurate drawing, turning intricate visions into precise realities on paper.
Draw Upside Down
By flipping your reference or drawing upside down, you engage the right side of your brain—your creative side. This method unveils errors that your brain might overlook, enhancing the precision of your artwork. When you turn your drawing upside down, your brain is tricked into seeing lines, shapes, and spaces rather than familiar objects. This disrupts your preconceptions about the subject and activates the right hemisphere of your brain.
Imagine working on a portrait. While drawing right side up, you might struggle with the symmetry of the eyes or the alignment of the nose. Flip your reference and canvas upside down, and suddenly, these features become abstract shapes that you can easily compare. Drawing becomes more about the relationship between lines and curves rather than the accuracy of an eye or a nose.
To put this into practice, follow these steps:
- Select a reference image and turn it upside down before beginning your drawing.
- Observe the image in this new orientation, noticing areas where alignment might be off or shapes don't quite fit together.
- Begin drawing, focusing on the relationship between lines and curves rather than the accuracy of specific features.
- Periodically flip your drawing right side up to check for discrepancies in proportion and perspective.
- Make corrections as needed, then flip the drawing back upside down to continue working.
This approach shifts focus from detailed familiarity to pure observational accuracy. It's beneficial for all levels of artists because it engages your brain in a different way. It also adds a playful element to your practice.
Flipping your work or reference encourages iterative improvement. Each time you turn it and make adjustments, you're refining your ability to observe and replicate proportions accurately. It's like practicing a musical instrument—playing notes backward forces your brain to rely on true understanding rather than rote learning.
If you ever find yourself stuck, feeling like something is off in your drawing, take a moment to flip it upside down. This small tweak can offer a fresh perspective and clear insight into what needs fixing. Over time, this practice will become an intrinsic part of your drawing process, providing clarity and precision.
Remember, drawing upside down isn't about creating perfect artwork immediately. It's about training your observational skills and improving your accuracy over time. Embrace the initial discomfort; it's a sign that your brain is working in new ways. This tool, though simple, is a powerful addition to your drawing toolkit, guiding you toward more accurate and aesthetically pleasing art.
Establish Grid Lines
Establishing grid lines is an invaluable technique for maintaining accurate proportions in your artwork. By dividing both your reference image and your drawing surface into vertical and horizontal grids, you create a visual map that helps pinpoint where each element should be placed.
To start, choose a reference image you intend to draw. Using a photo-editing tool, divide the image into equal sections with vertical and horizontal lines. Ensure that these segments are proportional to your drawing surface. For example, if your drawing surface is 10 inches by 10 inches, your reference image should follow a similar 1:1 ratio. This ensures the proportions from your reference translate accurately to your drawing.
Now, apply the same grid to your drawing surface. You can use a light pencil to sketch these guiding lines onto your paper or canvas. Keep these lines light to easily erase them after completing your piece. With these grids in place, your drawing blocks become smaller and more manageable. You can focus on drawing one segment at a time, ensuring each part aligns with its corresponding section in the reference image.
For instance, imagine drawing a detailed architectural scene—perhaps a historic building with numerous intricate details. By dividing both the photograph and your canvas into grids, you can focus on reproducing each section accurately. Each window, arch, and column falls perfectly where it should, guided by the grids. This method allows you to avoid distortions and disproportionate elements.
Grid lines play a crucial role in correcting mistakes. If one section of your drawing doesn't quite match your reference, the grids make it easier to identify where the error occurred. For example, if you notice that a character's arm appears too long, examine the grids to see where it veers off from the reference. Rectify these smaller segments, one grid at a time, making the task of correcting proportions less challenging.
Grid lines also come in handy for breaking down complex illustrations into more digestible parts. Take, for example, rendering a human portrait:
- Focus on one grid block at a time to ensure the alignment and proportion of the eyes, nose, and mouth.
- If the eyes span three grids horizontally in your reference, replicate this in your drawing.
- Use the grids to measure the spaces between features, maintaining the portrait's natural harmony.
In addition to guiding placements and proportions, grids offer another benefit—enhanced observational skills. As you consistently practice aligning your drawing with your reference using grids, your eyes become trained to see and measure distances more accurately. Over time, you may find you can gauge proportions and spatial relationships intuitively, needing the grids less frequently.
Like a master architect who lays the foundational grid for a building, setting up grid lines in your art is foundational to achieving accurate and proportional drawings. This guide leads to precise corrections and fosters an enhanced observational ability, making grid lines a simple yet transformative tool in your artist's toolkit.
Analyze and Monitor Progress
A thorough approach to improve your drawing involves analyzing your artwork, tracking your progress, and setting measurable goals. By diving deep into these steps, you pave the way for sustained growth and refinement in your artistic journey.
To begin, take stock of your current skill level. Gather a variety of your recent drawings and critically examine them. Identify recurring issues or areas where you can improve. Perhaps your proportions are slightly off, your shading lacks depth, or your lines aren't as clean as you'd like. This self-assessment isn't about harsh criticism but understanding where you stand and where you aspire to be.
Next, implement a system to track your progress—a visual analysis can be enlightening but documenting your journey in writing ensures you won't overlook gradual improvements. Create a simple spreadsheet to log your drawings. Each entry could include specifics like the date, reference used, time spent, techniques practiced, and a self-evaluation of what you did well and what you need to focus on next.
For instance, consider monitoring the symmetry of your subjects. If you're working on portraits, note down how balanced the facial features are and where improvements are needed. Include columns in your spreadsheet for different elements such as head shape, eye positioning, nose alignment, and mouth symmetry, rating each aspect on a simple scale. Over time, you'll be able to detect patterns and measure improvements quantitatively.
Documenting these details helps in setting clear, measurable goals. Rather than vague aspirations like "get better at drawing," aim for specifics like "improve the alignment of facial features" or "refine shading techniques over the next 30 days." Setting such concrete goals allows you to chart a clearer, more actionable path.
Establishing a learning schedule can significantly impact your progress. Similar to athletes who follow rigorous training plans, map out your artistic journey. Dedicate specific times for different exercises—proportions on Mondays, shading on Tuesdays, gesture drawing on Wednesdays, and so on. This structured approach ensures holistic development rather than sporadic bursts of effort.
For example, you might allocate 30 minutes daily to draw basic shapes, shadows, and textures. As the weeks progress, increase the complexity: move from a simple still life to more complicated compositions, maintaining the same foundational exercises to ensure consistency.
Another key element is feedback. Record observations from peers, mentors, or online communities. Create a section in your spreadsheet for this external feedback. It will give you diverse perspectives, helping spot issues you might overlook.
Keep a journal alongside your spreadsheet. Narrate your experiences, feelings, and insights. Drawing isn't just a mechanical skill; it's also an emotional and cognitive process. Reflect on what inspires you, challenges you encountered, and how different methods impact your art. Over time, this journal becomes a rich, qualitative record of your artistic growth.
In conclusion, while drawing might begin as a spontaneous and carefree activity, honing it into a precise art requires deliberate effort. By analyzing your work, carefully tracking progress, and setting concrete, measurable goals, you create a roadmap for continual improvement. Implement a thorough learning schedule and a thorough documentation process, intertwining self-assessment with feedback to refine your skills progressively. Your spreadsheet and journal become not just records but testaments to your evolving prowess, guiding you towards artistic excellence.
- Chamberlain R, McManus IC, Brunswick N, Rankin Q, Riley H, Kanai R. Drawing on the right side of the brain: a voxel-based morphometry analysis of observational drawing. Neuroimage. 2014;96:167-173.
- Cohen DJ, Bennett S. Why can't most people draw what they see?. J Exp Psychol Hum Percept Perform. 1997;23(3):609-621.
- Ostrofsky J, Kozbelt A, Seidel A. Perceptual constancies and visual selection as predictors of realistic drawing skill. Psychol Aesthet Creat Arts. 2012;6(2):124-136.
Use Imaginary Lines
Visualize horizontal and vertical lines to relate various elements of your drawing. This mental grid acts as an invisible framework, guiding your hand with precision. When you mentally lay these lines over your subject, you start seeing how each part aligns, ensuring every element is proportionate and harmoniously integrated.
Imagine drawing a human figure. Begin by establishing an imaginary vertical line running through the center of the body to maintain symmetry. Next, add horizontal lines—one through the eyes, one for the bottom of the nose, and one passing through the mouth. These guides ensure that features aren't misaligned.
Even when drawing irregular shapes—like the folds of fabric—imaginary lines help. Picture how these lines flow through the object, guiding the curves uniformly. If you're capturing drapery, envision vertical lines cascading down alongside the folds, helping you map where each fold should taper off.
Consider a landscape scene. Visualize a horizontal line at the horizon, then use vertical lines rising up from key elements like trees or buildings. This imaginary grid ensures that your landscape maintains spatial accuracy.
Another benefit of this technique is its portability. Unlike actual grids that need to be drawn, mental grids can be summoned anytime, allowing you to maintain accuracy even in on-the-spot sketching sessions.
This technique also applies to spaces between objects. Drawing a still life of a bowl of fruit? Visualize lines to maintain the bowl's circumference and ensure fruits inside align correctly.
Employing imaginary lines enhances your spatial reasoning, training your eyes to see beyond the surface and focus on underlying structures. Over time, this becomes second nature, freeing you up to concentrate on the artistry itself.
Embrace the power of these invisible guides to review and correct your work. If something feels off, pause and reintroduce these mental lines. This fosters a habit of continuous refinement, ensuring accuracy without stunting creativity.
Visualizing imaginary lines becomes a subtle yet powerful ally in your artistic journey, ensuring that every element relates harmoniously to one another.

Practice Deliberately
Practice deliberately by engaging in focused, goal-oriented sessions designed to improve specific aspects of your drawing. This method is about the quality and intention behind your practice.
Begin by identifying aspects of your drawing that require refinement, such as capturing accurate shadows or improving line work confidence. Set a clear, manageable goal for each session suited to these needs.
Each session should include a warm-up phase. Spend the first ten minutes sketching basic shapes, practicing freehand lines, or replicating simple patterns. This primes your mind and wrist for more intensive work.
With your objective clear, immerse yourself intentionally. Use reference materials that challenge yet complement your current skill level. Break the task down into manageable segments.
Engaging in deliberate practice often means stepping outside your comfort zone. If drawing hands has always been your weak point, face this challenge head-on. Dedicate a session exclusively to sketching hands from different perspectives and poses.
Take advantage of timed exercises to boost precision and speed. Set a timer and aim to capture the essence of a subject within that period. This pushes you to make quick, decisive marks, trimming away unnecessary hesitation.
Seeking constructive criticism amplifies the benefits of deliberate practice. Share your sketches within a community for an outside perspective that can reveal habitual errors or overlooked details.
Make a habit of frequently reviewing your progress. Keep a portfolio of your practice sessions alongside completed works. Over time, watching the evolution of your skill set will be both motivating and instructional.
Reflect on the impact of different techniques. Did working on gesture drawings beforehand make capturing proportions more intuitive? Document these insights to guide future sessions and keep your methods adaptable.
Celebrate small victories to stay motivated. Progress in drawing is incremental, and every bit of improvement builds toward greater mastery.
In essence, practice with purpose. Commit to sessions with specific aims, challenging yourself to tackle weak points and experiment with new techniques. Engage intensely with each aspect of your drawing, documenting and reflecting on your journey. This focused approach sharpens your skills and nurtures a resilient, growth-oriented mindset.

The key to improving your drawing lies in mastering basic forms and practicing deliberately. By incorporating these methods into your routine, you'll build a strong foundation that supports more accurate and aesthetically pleasing artwork.


