Imagine standing before a vast landscape, feeling the emotions it stirs within you. Is it serene, untamed, or bustling with life? As you begin to sketch, think about what you want to convey. Lightly frame your scene and consider where each element will fit. This is the start of creating a piece that captures not just what you see but also how it makes you feel.
Thinking from the Whole
Gazing across your landscape, consider the emotions it evokes. Is it tranquil, wild, or busy? Decide on what you want to express. Sketch lightly to frame your scene, setting boundaries. Envision where everything fits. Use a viewfinder or phone to check your limits. Begin with gentle lines to figure out your layout and proportions. Keep it loose. Your initial lines don't need to be perfect—just a guide for your drawing.
Composition
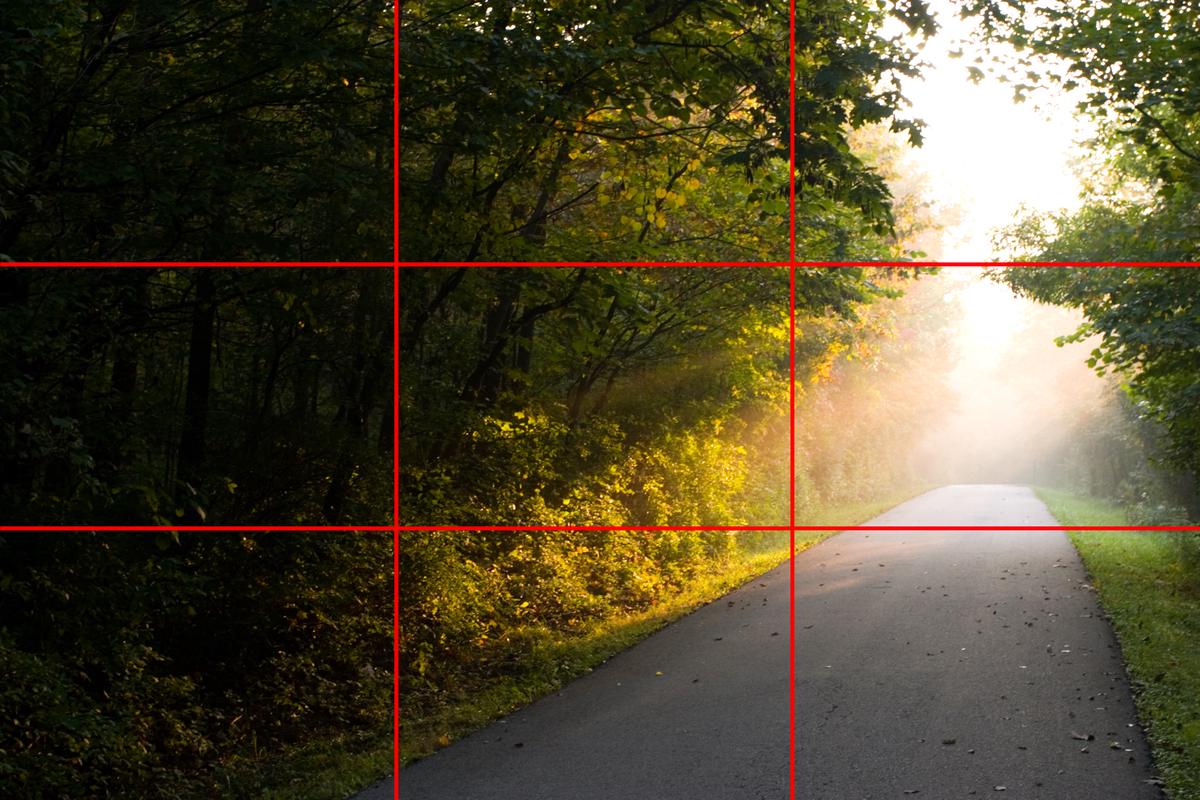
Composition in landscape drawing is your guide for keeping everything balanced and pleasing to the eye. The rule of thirds can help arrange elements harmoniously. Consider placing points of interest where imaginary grid lines intersect for visual balance.
Think in layers: foreground, middle ground, and background. This layering creates depth, pulling your viewer into the scene. Leading lines, like a winding river or trail, can guide the viewer's eye through the landscape.
Don't forget perspective. Mastering one-point, two-point, or three-point perspective can make your landscape more realistic.
Light and shadow play a crucial role. Knowing where your light source is helps you add depth and mood. Use lighter tones where the light hits and darker tones for shadows. This can create focal points and draw attention where you want it.
Add textures and details where they matter, like tree bark or ripples on a pond. These touches can bring realism without cluttering your scene. If using color, think about the mood you want to evoke and choose a harmonious palette.
Your landscape is like a symphony, with each element coming together to create balance. So, pick up your pencils and enjoy the creative process. After all, the journey of a thousand sketches begins with a single stroke!

Proportion
Balancing proportions in your landscape drawing is about getting things just right. Start by observing what stands out in the scene. Your task is to capture these elements proportionately, ensuring they fit together well on your paper.
Pick a unit of measurement, like the height of a particular tree, as your reference point. Compare other elements to this standard. Use your pencil as a ruler, holding it at arm's length to measure and compare proportions in your scene.
Start with light sketches of basic shapes and placements. These initial lines are the bones of your drawing, giving you a rough guide. As you sketch, compare the different parts. How does the width of the river compare to the trees along its banks?
Remember that objects closer to the viewer appear larger and more detailed, while those farther away are smaller and less defined. This creates depth and realism.
Once satisfied with placement and proportions, start refining your drawing. Darken lines you're sure about and add some shading. Keep reassessing as you go, making adjustments as needed.
Step back periodically or look at your drawing in a mirror to get a fresh perspective. This helps spot any proportional errors you might have missed.
Balancing proportions isn't just about precision; it's about creating a believable representation of a landscape. With practice, your eye for detail and ability to capture the essence of a scene will improve. Enjoy the process and the quiet moments of observation.
Adding Depth and Texture
Adding depth and texture can breathe life into your landscapes. These details can elevate your work from a simple sketch to a piece rich in visual interest.
Embrace various shading techniques like hatching, cross-hatching, stippling, and blending. Hatching uses parallel lines to create shadows and light. Cross-hatching layers another set of lines at an angle, great for complex textures like tree bark. Stippling uses dots, perfect for fine details like rocky surfaces. Blending creates smooth transitions, ideal for water or sky.
Understanding your light source is crucial. Is the sun casting long shadows or is it a cloudy day? This helps establish areas of light and darkness, creating a three-dimensional effect.
For specific textures:
- Grass: Long, gentle strokes for swaying blades; shorter strokes or stippling for denser areas.
- Trees: Cross-hatching and stipples for intricate bark details.
- Rocks: Combine hatching, cross-hatching, and stippling for rough surfaces.
- Water: Soft, blended strokes for fluidity and reflections.
Experiment with different mediums. Graphite pencils are great for fine lines and subtle shading. Charcoal offers bold, expressive lines and dramatic contrast.
Mix these techniques to create a cohesive, vibrant piece. Pay attention to how tones interact – the delicate grass, sturdy trees, and calm water. Your landscape isn't just a collection of elements; it's a story told through textures and depth.
So experiment, play with light and shadow, and be daring with your textures. The beauty of landscape drawing lies in these details, transforming a simple scene into a world full of life and emotion.
Your landscape drawing is more than just lines on paper; it's a story told through textures and depth. Each stroke adds character, transforming a simple scene into something vibrant. So pick up your pencils and enjoy the process—every sketch brings you closer to capturing the world as you see it.
- Priestley P. How to Draw Landscape. PaulPriestleyArt YouTube Channel.
- Kautzky T. The Ted Kautzky Pencil Book. New York: Watson-Guptill; 1979.


