Hatching
Hatching involves drawing parallel lines to create shading. Adjust spacing and direction to depict different textures and levels of light. Close lines yield darker shades, while spaced lines keep it light. Think of wood grain or brushed metals. These surfaces gain a lifelike touch with hatching but be wary when employing it on rounded forms. Missteps can make your sphere resemble a disc.
Consider a wooden toy. Hatching can mimic the fine grain lines, giving the toy a textured, authentic feel. For brushed metals, like a fancy silver spoon, keep your lines even and consistently spaced. Use sharper pencils to maintain the metallic shine, allowing the texture to glimmer subtly on a flat surface.
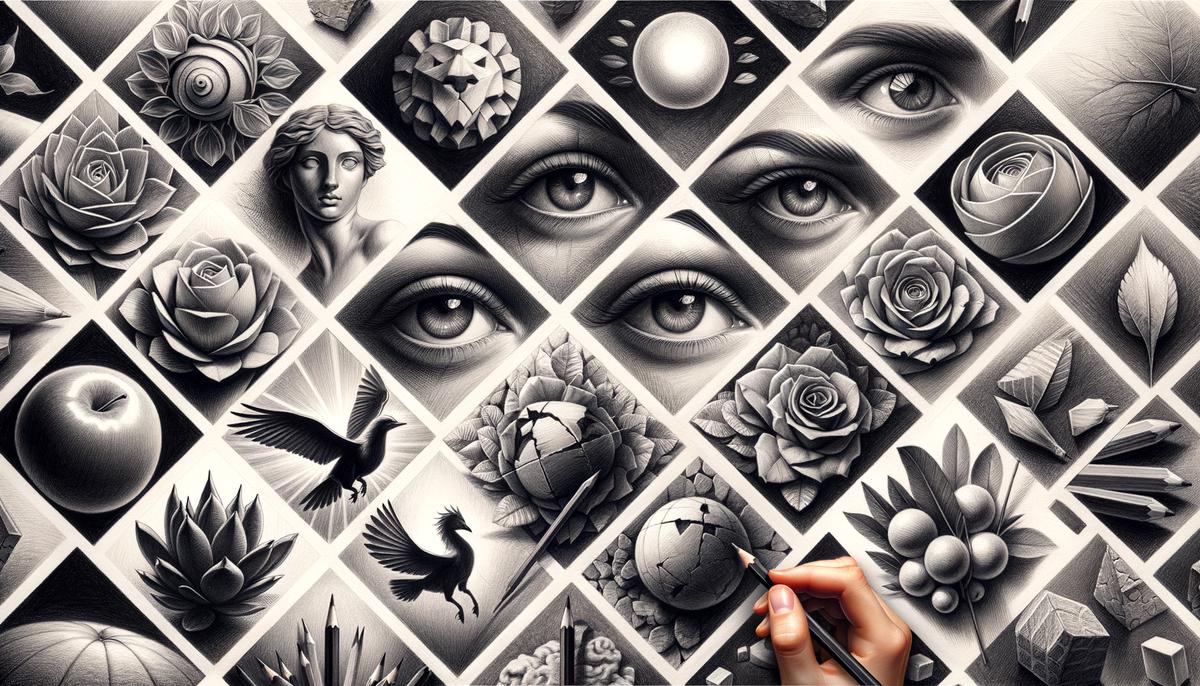
When applying hatching to a face or portrait, you need a gentle hand. The forehead could get soft, slightly curved parallel lines. On cheeks, where light hits unevenly, vary your pressure. Denser lines capture shadows under the cheekbones.


For eyes, soft hatching works best. Align your lines to the curve of the eyeballs. Use tighter hatching for pupils, giving them depth and the illusion of light reflection. The surrounding whites need softer, lighter hatching.
Nails display prominent stripey patterns. Here, hatching serves well. Directional lines lengthwise on nails enhance this effect. Should you decide to hatch skin, remember that skin isn't uniform. Fine lines can depict subtle shadows and wrinkles, adding age and detail.
Imagine shading a wooden fence. Begin with parallel lines. Shadows fall across the imperfections in boards – knot holes, cracks. Varying line directions catch these traits, rendering a more intricate, engaging visual story.
Practicing hatching on simple objects first aids mastery. Start with a cube. Shadow one side fully, varying the space between your lines for intensity. Move to apples next. Keep your lines soft and follow the curve. Move slower on concave parts, allowing a darker hue to emerge.
Manipulating light and shading with hatching requires patience and precision. Smooth transitions and textures come with deliberate, careful line placement. Aim for consistent, even strokes. Every pencil stroke should add depth, enhancing the illusion of form and space. By methodically varying your pressure and distance between lines, hatching elevates a simple drawing into a more complex, textured narrative.
Cross-Hatching
Cross-hatching builds upon the hatching technique by layering intersecting lines. The density of the crossings dictates the darkness and intensity of the shadow. This method is excellent for adding intricacy and texture to fabrics and skin.
Let's start with fabrics. Imagine rendering the intricate folds of a draped curtain:
- Begin with your standard hatching—long, flowing lines that follow the drape.
- Then, to enhance depth, cross these lines at an angle.
- The intersecting lines will mimic the weave of the fabric, and the varying densities will capture the play of light and shadow.
- Where the curtain gathers and folds on itself, make your cross-hatching denser to convey deeper shadows.
- For the lighter, airy sections, keep the crossings sparse.
Now, apply this to skin, which isn't as uniform. Skin has pores, subtle lines, and shadows created by the smallest details. Start with a soft base layer of hatching, aligned with the curvature of the form. Then, carefully layer crossing lines where shadows deepen, such as around the eyes, under the cheekbones, and along the jawline. The more layers you add, the richer the texture and the more lifelike the result.
When refining a portrait, cross-hatching can help bring out the details in the subject's expression. Smiles with crow's feet or furrowed brows have intricate lines that cross-hatching can capture beautifully. Think of the human face as a complex landscape—each wrinkle, each shadow, a story in intersecting lines.
Arms and legs benefit from cross-hatching by highlighting the contours of the muscles and the light's play on the surface. When sketching an arm, begin with long, curved hatches following its natural form. Then layer in cross lines where shadows fall deepest—under the arm, around the bicep's curve, and near the elbow. The multiplicity of lines adds shadow and builds a robust, textured look.
Background elements like trees, rocks, or even architecture greatly benefit from cross-hatching. For example, a rugged tree bark could start with vertical hatching. Add horizontal crossings to show the texture of the bark. The pattern, captured through this method, can be rugged and intricate.
In practice, start small. Sketch an apple with your initial hatching, but add crossings to show the dimples and shadows. Get to hands, which are complex enough to test your skills. Shade individual fingers; layer crossings for knuckle shadows and palm creases. Each intersecting line adds a layer of intricacy and realism.
Mixed-use of hatching and cross-hatching in an artwork brings forth a rich tapestry of textures and depths. Your practice pieces will transform from simple outlines to shaded masterpieces, each line contributing to an evolving narrative of light, texture, and form.
Blending
Blending enables smooth transitions between shades, crucial for achieving realistic gradations of value. This can be done by varying pressure on the pencil or using tools like blending stumps or tissues. Blending is particularly useful for softer textures and can also be combined with techniques like erasing to bring out highlights and enhance the dimensionality of your drawing.
Picture this: you're rendering a serene landscape—a sunset over a calm lake. The sky needs a gradation from vibrant yellows to serene purples. Here, blending shines. Start by layering different shades of pencil strokes loosely. Apply varying pressure—darker and heavier where shadows are more profound, lighter when blending into highlights.
Once your base layers are down, grab a blending stump or even a tissue. With gentle, circular motions, start blending your pencil strokes. The paper scrapes away the harsh edges, leaving transitions as smooth as that serene evening sky you're drawing.
Blending isn't just for large areas. It excels in softening delicate textures—like skin, for example. For a portrait, after laying down your initial hatching or cross-hatching, use a blending tool to smooth out the skin tones. This technique erases the gritty feel, bringing out varied textures, from the soft blush of cheeks to the subtle shadows around the eyes.
Erasing, often considered a mistake-correcting tool, becomes an ally in blending. Picture capturing the spark in someone's eye. Lay down mid-tones around the eye area; then, with a precision eraser, lift the highlights. The eraser creates an immediate, seamless contrast against the blended tones, making those eyes come alive. The highlight reflects light, mimicking reality with accuracy.
Consider fabrics again—this time a velvet cloth. Begin with hatching to indicate the folds, then blend. This softens the lines, giving the fabric a plush, luxurious look. Dark shadows can fade seamlessly into lighter areas, capturing the texture's rich depth and softness.
In architectural drawings, blending can depict light falloff on surfaces, such as a parapet bathed in partial shadow. Start with graded pencils to lay a gradient, then blend carefully for realistic light transitions. Erase slight areas to add contrast, simulating reflective light. The edifice springs to life, its corners and edges softened by the play of light and shadow.
Blending shines when tackling organic objects. A leaf's curvature, the soft feathers of a bird, or even the gentle waves of a petal are all brought to life with this technique. Begin with light shading, then blend to soften the curves. Add highlights by erasing selectively, which emphasizes texture differences and light interactions.
Practicing blending starts simple. Draw a gradient sphere: shading from dark to light. Blend till the transitions appear smooth, resembling a 3D sphere more with each stroke. Use tissues for large areas; blending stumps for precision. And never underestimate the power of your fingers—though remember to clean them to avoid smudges!
In practice, blend the delicate surfaces of objects—a rose petal, a glass marble, a reflective metal. Adjust pressures, from gentle touches to firm strokes, experimenting with how light bends and reflects. Combine with hatching or cross-hatching for dynamic depth. Erase to highlight, carving shapes from the smoothly transitioned tones.
Embrace blending to elevate a line drawing into textured narratives. This seamless dance of light, shadow, and texture captures the world's intricate beauty, one smooth transition at a time.
Understanding Light and Values
Understanding how light interacts with objects is vital for effective shading. When light hits an object, it creates highlights, mid tones, core shadows, and cast shadows. Each element helps convey the form and texture of the subject.
Highlights are the brightest spots where the light source directly hits the object. Mid tones are the true colors or values, moderated by ambient light. Core shadows are the darkest parts where light doesn't hit directly, crucial for creating volume. Cast shadows fall on surfaces adjacent to the object, grounded it in place.
Light direction is crucial. If the light source is to the left, highlights appear on the left side, with mid tones transitioning to core shadows on the right. Cast shadows stretch rightward. Intensity of light marks the range of values. Bright light increases contrast, while softer light blends the transition between highlights and shadows.
Practice these concepts using simple geometric shapes like cubes, spheres, and cylinders. Vary the light source position and observe the shifts in each element. Mastering light and values transforms flat sketches into compelling, lifelike narratives.

Contour Shading
Contour shading involves following the natural contours of an object with your shading lines. This technique adds a three-dimensional quality by accentuating the shape and form of the subject. It is particularly effective for items like fruits or facial features.
Imagine drawing an apple. Let your pencil strokes trace the curves from the top, down to its dips and round sides. By aligning strokes with the natural form, you capture the essence of its shape.
For a human face, the curvature of cheeks, slope of the nose, and roundness of the chin all benefit from contour shading.
- Allow lines to follow the forehead's roundness toward the temples.
- Align cheek strokes outward from the middle, following the incline to the jawline.
This reinforces the facial structure.
The human figure's anatomy also lends itself to contour shading. For an arm, start from the shoulder, with lines following the deltoid muscle cascading down to the bicep and forearm's taper. This accentuates each muscle group's natural prominence.
Combine contour shading with other techniques for intricate results. Layer in cross-hatching to deepen crevices or apply stippling for grainy textures. Always be mindful of light sources. Contours should reflect the fall and spread of light.
Practice with everyday objects like an egg. Trace the gentle curvature with consistent pencil pressure for highlights and press harder for shadows. You'll observe how shading naturally enhances the egg's simplistic, elegant form.
Patience and observation are key. Break down each object into manageable shapes and curves, following the paths dictated by form and light. Contour shading transforms a basic sketch into a lively, textured masterpiece, capturing nature's inherent beauty and dynamism.
Mastering shading takes patience and practice. By focusing on the nuances of light and shadow through various techniques, you can elevate your drawings from flat outlines to textured pieces. Keep refining your skills with each stroke, bringing your art closer to life.


